
• Parts
  • Services
  • OEM Equipment &
    Engineered Systems
  • EPC &
    Turnkey
  • Industries
    Served

How to Choose Auto Darkening Window Film?

Choosing the right Auto Darkening Window Film is not simply about finding the darkest glass. It requires a careful balance between glare control, heat reduction, privacy, comfort, and clear outdoor views. A film that looks impressive in a showroom may perform differently beside a bright south-facing window. Room orientation matters. So does the glass type.

Stephen Selkowitz, a respected building-energy and advanced-window specialist, has said, “The best window is not simply the darkest one; it is the one that manages daylight, heat, and view together.” That principle should guide every buying decision. Check the film’s visible light transmission, switching speed, ultraviolet protection, infrared performance, and power requirements. Ask whether it works with double glazing, laminated glass, or low-emissivity coatings. Small technical differences can affect comfort and safety.

Do not trust dramatic promises alone. Request independent performance data, installation instructions, and a written warranty. Look closely at the control system, too. Wall switches, sensors, remote controls, and smart-home connections can create very different user experiences. A slow transition may be acceptable in a bedroom, but frustrating in a conference room.

The uncomfortable truth is that no film solves every window problem. Some products reduce glare but slightly soften the view. Others offer privacy only when powered off or switched on. I have seen buyers focus on appearance and overlook maintenance access. That mistake becomes expensive later. This guide will help compare real performance, installation conditions, and long-term value before you choose an Auto Darkening Window Film.
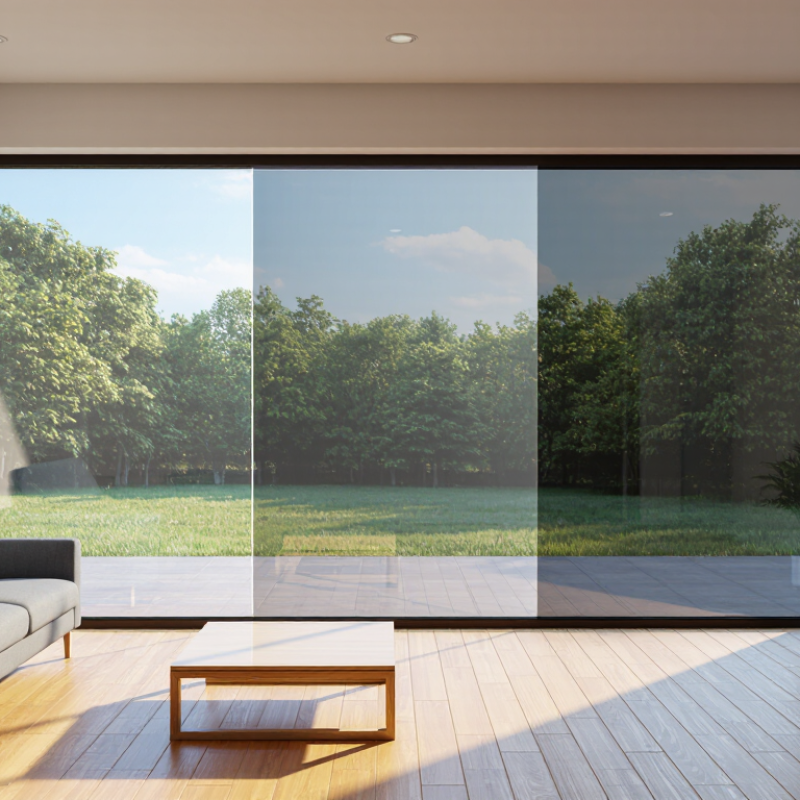
How to Choose Auto Darkening Window Film?

Understanding How Auto-Darkening Window Film Works

How to Choose Auto Darkening Window Film?

Understanding how auto-darkening window film works begins with its control system. Most advanced films use an electrochromic layer that changes light transmission when voltage passes through it. A sensor or wall controller detects strong sunlight and signals the film to darken. When light levels fall, the layer gradually becomes clearer. It is not magic. It is a controlled optical response.

The film’s visible light transmission, or VLT, shows how much daylight enters the room. A lower VLT creates stronger shading, while a higher VLT keeps the space brighter. Check the switching time, power consumption, and failure setting before choosing. Some systems become clear during a power loss, while others remain tinted. That detail matters in offices, bedrooms, and rooms with large windows. Heat rejection also depends on glass type, film construction, and installation quality, not tint level alone.

A practical inspection should include wiring, sensor position, edge sealing, and surface preparation. Dust beneath the film can appear as small silver dots. Poor alignment can leave uneven borders. A common mistake is assuming darker always means better. It may reduce glare but create a gloomy room. Ask for tested data on ultraviolet protection, solar heat gain, and expected service life. These figures are more useful than vague claims. Even careful specifications need local testing, because climate, window direction, and indoor lighting can change the result.

Identifying Your Window’s Size, Type, and Installation Requirements

How to Choose Auto Darkening Window Film?

Start by identifying the window’s exact size. Measure the visible glass width and height at the top, middle, and bottom. Record the smallest measurement, but confirm the film’s cutting tolerance before ordering. Measure twice. A small error can leave exposed glass or create awkward trimming around the frame.

Glass matters. Check whether the window is single-pane, double-pane, tempered, laminated, low-emissivity, or curved. Some films may increase heat stress on certain insulated glass units. Look for the glass specification, not only the window’s appearance. If the glass type is unclear, ask a qualified glazier or installer to inspect it. This step is easy to overlook.

Installation requirements also affect your choice. Confirm whether the film needs wiring, a controller, a transformer, or a nearby power outlet. Measure the cable route and check whether the frame allows clean edge clearance. The surface must be smooth, dry, and free from silicone residue, dust, and old adhesive. Large panes may require two trained installers, especially in narrow rooms or high locations. Allow curing time before cleaning or testing the film. I have found that rushed installation causes more problems than film selection. Recheck the measurements, electrical load, and glass compatibility before purchase.

How to Choose Auto Darkening Window Film? - Identifying Your Window’s Size, Type, and Installation Requirements

Window or Project Factor How to Identify It Typical Values or Conditions Recommended Film Consideration Installation Requirement
Small fixed window Measure the visible glass width and height at three points and use the smallest measurement. Up to approximately 1.2 m × 1.5 m; size varies by product. A single-piece film is usually easier to align and produces fewer visible seams. Leave a narrow perimeter clearance if required by the product instructions; keep the glass clean and flat.
Large picture window Record the total glass area, maximum width, and maximum height. Check whether access allows a one-piece installation. Often wider than standard film rolls; large panels may require multiple sections. Use a product available in the required width or plan vertical seams outside the main viewing zone. Two installers may be needed to prevent creases, trapped air, and misalignment during application.
Sliding glass door Measure each moving panel separately, including the glass height below the frame. Common panels are approximately 0.7–1.0 m wide and 1.9–2.4 m high, but site dimensions vary. Choose a durable film compatible with frequent door movement and edge contact. Keep the film clear of rollers, handles, seals, and frame channels; test door operation after installation.
Casement or awning window Identify the opening direction and measure the glass without including the sash, gasket, or frame. The sash moves outward or inward and may have limited clearance around the perimeter. Select a thin, flexible film only when the product is approved for operable windows. Maintain clearance from hinges, handles, weather seals, and locking hardware.
Single-pane glass Check whether the glass has one visible layer and inspect it for chips, scratches, or loose glazing. Common in older buildings; thermal performance is generally lower than insulated glazing. Verify that the film is rated for the glass thickness and expected solar exposure. Do not install over damaged glass; repair glazing defects first and follow thermal-stress guidance.
Double- or triple-glazed unit Look for a sealed spacer between two or three panes and check whether the film is approved for interior or exterior use. Insulated glazing has sealed air or gas spaces and is more sensitive to incompatible surface films. Use only a film with documented compatibility for insulated glass units. Confirm warranty conditions and solar-heat specifications before installation; avoid unapproved dark films.
Tempered or laminated glass Check construction documents or ask a qualified glazier; visual inspection alone may not be conclusive. Tempered glass is heat-treated; laminated glass contains a plastic interlayer. Choose a film specifically tested for the glass construction and intended exposure. Use professional installation for safety glazing, overhead glazing, or large panes.
Clear glass The glass has no visible tint, coating, pattern, or reflective appearance. Usually the simplest substrate for optical switching or light-responsive film. Select the desired clear-state light transmission and dark-state privacy level. Clean with a residue-free solution and remove dust before bonding or mounting.
Low-emissivity or tinted glass Look for a visible tint, reflective coating, energy label, or documentation identifying a low-E surface. Existing coatings alter heat absorption, reflection, color, and visible light transmission. Choose a compatible low-absorption film and confirm the film-glass combination is permitted. A glass-performance review is recommended to reduce thermal-stress and seal-failure risks.
Film operating method Decide whether darkening should respond to sunlight, a wall switch, a sensor, or an automated control system. Photo-responsive films need light exposure; electrically switched films need a power supply and controller. Choose the technology according to the required response time, privacy mode, and control method. Plan sensor location, wiring routes, controller access, and electrical protection before fitting the film.
Power and control access Locate the nearest safe power point and determine whether the window is fixed, hinged, or sliding. Electrical films may require a low-voltage transformer or controller; requirements vary by system. Select a system with suitable voltage, switching capacity, and fail-state behavior. Electrical connections should be completed by a qualified person and kept protected from moisture.
Moisture and exterior exposure Determine whether the film will be installed indoors, outdoors, in a bathroom, or near condensation. Humidity, water, ultraviolet radiation, and temperature changes can shorten service life. Use a sealed, moisture-resistant product for wet areas and an exterior-rated product for outdoor exposure. Seal exposed edges where specified and prevent water from reaching electrical connections.

Measurement note: Record the visible glass dimensions in millimeters, confirm the glass construction, and verify the film’s maximum panel size, electrical requirements, and compatibility instructions before ordering.

Comparing Tint Levels, Light Control, and Privacy Features

How to Choose Auto Darkening Window Film?
Comparing Tint Levels, Light Control, and Privacy Features

Tint level should match the room’s daily light, not only its appearance. A lighter setting preserves outdoor views and reduces glare on screens. A darker setting cuts stronger sunlight but may make interiors feel gloomy. Check the film’s visible light transmission rating before choosing. Lower transmission usually means a darker appearance.

Light control also depends on the glass, window direction, and room temperature. South-facing windows often need stronger glare reduction than shaded windows. During testing, view the glass at morning, noon, and late afternoon. The result can change dramatically. Some films reduce brightness well but do not block enough heat. Others improve comfort while slightly affecting color clarity. That trade-off is easy to overlook.

Privacy needs closer attention. Dark tint does not guarantee privacy after sunset, especially when indoor lights are on. Reflective surfaces may provide daytime privacy, but their effect can reverse at night. Switchable films can offer clearer separation between transparent and opaque modes. However, haze, switching speed, and visible edges may differ between installations. Ask for sample panels and inspect them from both sides. A small sample may look perfect, yet a full window can reveal uneven shading. Local building requirements and window warranties should also be checked before installation.

Evaluating Heat Rejection, UV Protection, and Energy Efficiency

How to Choose Auto Darkening Window Film?

Choosing auto darkening window film should begin with measurable performance, not appearance. The U.S. Department of Energy reports that windows can cause 25–30% of residential heating and cooling energy use. Check the film’s solar heat gain coefficient, or SHGC. A lower SHGC usually means less solar heat enters the cabin. Visible light transmission also matters. Very dark film may reduce glare, but it can make night driving uncomfortable and reduce visibility.

UV protection deserves equal attention. The Skin Cancer Foundation notes that window glass blocks most UVB but allows significant UVA transmission. Look for independently tested films claiming over 99% UVA and UVB rejection. Ask for the test method and certificate. Marketing language alone is weak evidence. The Lawrence Berkeley National Laboratory’s WINDOW research emphasizes evaluating glazing through properties such as SHGC, visible transmittance, and U-factor. These values should be compared together, not separately.

Energy efficiency depends on climate and installation quality. In hot regions, strong infrared rejection can reduce air-conditioning demand, while excessive darkness may increase lighting needs. That trade-off is easy to miss. I once focused too heavily on heat rejection and underestimated nighttime clarity. Review the data sheet, inspect the edges, and confirm professional installation. Poor alignment or trapped moisture can undermine otherwise excellent performance. U.S. Department of Energy, Energy Saver; Lawrence Berkeley National Laboratory, WINDOW research.

How to Choose Auto Darkening Window Film?

Evaluating heat rejection, UV protection, and energy efficiency

The chart compares representative midpoint performance values for common automotive glass and film types. UV protection refers to ultraviolet radiation blocked, while energy efficiency represents the estimated reduction in cabin cooling demand under comparable conditions. Actual results vary with glass type, film shade, climate, vehicle design, and installation quality.

Selecting Film Quality, Compatibility, and Professional Installation Options

How to Choose Auto Darkening Window Film?

Film quality should be judged by measurable performance, not a darker appearance. The U.S. Department of Energy reports that windows can cause 25–30% of household heating and cooling energy use. A quality film may reduce glare and solar heat, but its performance depends on glass type, orientation, and installation. Check visible light transmission, infrared rejection, UV protection, switching speed, and power requirements. NFRC guidance also highlights U-factor, solar heat gain coefficient, and visible transmittance as useful comparison points. Marketing claims alone are not enough.

Compatibility needs careful inspection. Confirm the film suits tempered, laminated, double-pane, or curved glass. Electrically switchable film also needs stable wiring, suitable controllers, and enough space around edges. Some films may increase heat absorption on insulated glass. Ask for written compatibility guidance and a sample test on the actual window. It is a small step.

Professional installation often determines the final result. Experienced installers measure glass accurately, remove dust, protect electrical connections, and check for bubbles after curing. Industry training standards commonly stress surface preparation and controlled installation conditions because contamination can shorten service life. Request documented film specifications, warranty terms, and maintenance instructions. I once underestimated edge clearance on a curved panel; the film looked acceptable but switched unevenly. That mistake changed my checklist. No film is perfect. Performance should be verified in real daylight, not only in a showroom.